We’re pleased to share our Put the Kettle On reader submission series with you. Everyone has a story to tell and when those stories include tea, well we’re smitten. We hope you enjoy this story and if you’re inspired to share your story with us, tell us about it. ~Editor and Content Manager, Dawn Light
Making Tea in the British Army
One of the enduring memories I will always have of my time in the British Army was the ability to “get a brew on” whenever possible. For those that don’t speak the language, that means make a cup of tea! Right from basic training you’re taught that if you’re going to be in one location for more than 15 minutes – and you have the kit and are allowed to light a fire – make a brew. You never know when you’ll get the next one.
The Kit
The standard issue stuff you have to use in basic training is a mess tin and a hexi burner. A hexi burner was a simple contraption of thin metal that folds out to give you legs and contains the solid fuel – called hexamine… hence hexi burner. One pack of these solid fuel tablets was supposed to last for 24 hours and the burner itself for several days, if not more. Size wise the hexi burner and the fuel were a little smaller than the average paperback book. Finding a flat post to boil the water was another matter. It was normal to dig a hole to place the burner in. This would get it flat and that also helped to hide the flame from view… thus making it safer to brew at night. 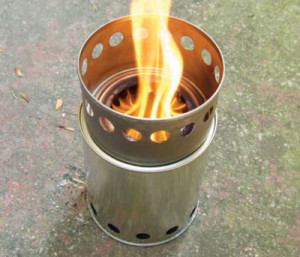 The one thing that is a huge negative about these hexamine blocks is the amount of soot they make. Hygiene whilst in basic training or out on exercises is emphasized massively. So once you have boiled the water and made your brew, you have to clean the soot from the bottom of the mess tin. During basic training this means scrubbing the mess tin until it is the same standard that it came out of the factory! (I cheated. I started to carry an extra set of brand new mess tins to show on inspections and cooked on the old ones!) Some of the more stringent instructors also wanted the hexi stoves themselves scrubbed! You soon learn that size and weight are important factors in the Army and the brew making kit is no exception. It was therefore a bit of an art to see how small you could get a brew kit down to. The British Army issues a one liter water bottle with a plastic mug that fits over the top of it. The US Army, however, has a metal mug that isn’t too far away in terms of size and shape from the plastic one… so metal mugs were acquired either by trading with US soldiers or just outright purchase from the many surplus shops around military camps. So, all you need is three six inch nails, a metal mug, some hexi blocks and a brew kit.
The Brew Kit
British Army rations were big on drinks. Lots of tea, coffee and something we used to call ‘Screech’. (Screech is powdered fruit juice that you pour into your water bottle. It’s an acquired taste and tastes as good as the nice name suggests.) The coffee was of the instant variety and must have had enough caffeine to keep you awake for days. Tea was simple – just tea bags. Each tea bag would easily make a full pint of tea. When you only needed a quick drink, due to time, you would share the tea with your mates so as not to waste the tea bags. To be fair I never once ran out of tea bags – you got a lot in each ration pack. Sugar was a staple in each brew, whether or not you liked or wanted it. Extra energy was important. The standard was for “TW2” – Tea, White 2 Sugars. This was actually called “NATO Standard”, so if you were asked what you wanted you just replied ‘NATO” and the tea came hot, strong, milky and with two sugars. Milk was powdered and you had to be really careful to avoid the lumps in your tea… so sometimes you got tea that was a bit chewy, especially at night when you couldn’t really see well enough to mix it all together properly.
The Process
Speed, process and efficiency are paramount so basically the quickest way to make a brew is to put everything in one mug and let it boil or stew.
- Six inch nails in the ground to rest your mug on (this gets the mug flat more easily), hexi blocks between the nails and under the mug. Mug is placed on top of the nails.
- Cold water goes into the mug along with a tea bag, milk and sugar.
- Lighting the hexamine blocks could be a challenge but included in the ration packs were waterproof matches. These things would stay lit even in a thunderstorm and blowing gale.
- Stir like crazy to get rid of lumps and brew the tea. The size of the hexamine blocks dictate the speed of the water boiling (as well as whether or not you cover the top of the mug, which is usually done with another mug).
- From start to finish you could have a decently warm brew within maybe 15 minutes.
One of the benefits of making tea at night is that you didn’t see the bugs, grass, leaves or whatever that always seemed to fall into your mug. You just spat the bits out! You only really got the water boiling if you had the time. Remember if you had a quick move, this hot metal stuff needed to be put away in a hurry!
Storage
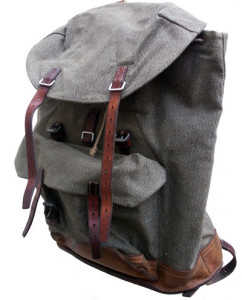 Six inch nails, a few tea bags, some sugar and a few hexamine blocks were in my combat jacket pockets all the time. The metal mug was over the water bottle in the webbing, which you never went anywhere without.
Moral
When you’re cold, wet, and miserable, and feel like you need to curl up and die from tiredness, there’s nothing on this earth like a warm brew. You may be covered in mud, stinking from not being able to shower for days or weeks, cold and tired, but a brew just seems to take all that away. The jokes will start and moral gets better. The simple act of being able to share a mug of tea with your mates, who look and feel just as bad as you do, is awesome.
14 years after leaving…
I love the outdoors and still walk the mountains around South Wales (UK) where I live. I always carry a full bergan kit, just to be safe and always, always have enough with me to make a brew! Some things never leave you! -Andrew Miller

